Have you ever wondered how to effortlessly elevate your outdoor spaces with stunning WPC decking? Are you curious about the secrets behind flawless installation that stands the test of time? Look no further! In this exclusive guide, we unravel the mysteries of Meterny WPC decking installation. Are you ready to embark on a journey of innovation and craftsmanship? Join us as we unveil the art of decking installation with Meterny.
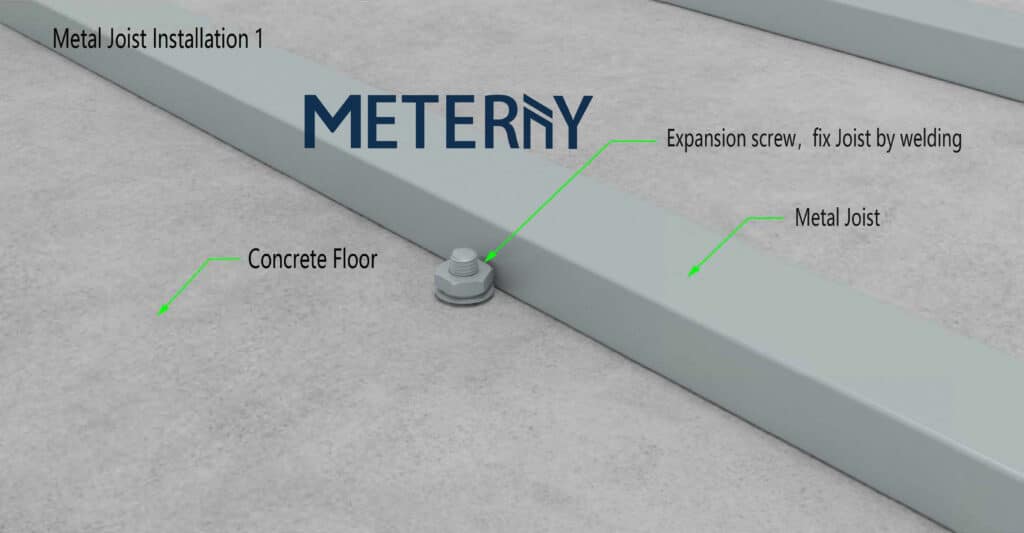
1.Joist Installation: Secure the metal joists to the concrete floor using expansion screws, ensuring a sturdy connection.
![Meterny WPC Floor panel installation guide-3](https://meterny.com/wp-content/uploads/2024/05/Meterny-WPC-Floor-panel-installation-guide-3-1024x533.jpg)
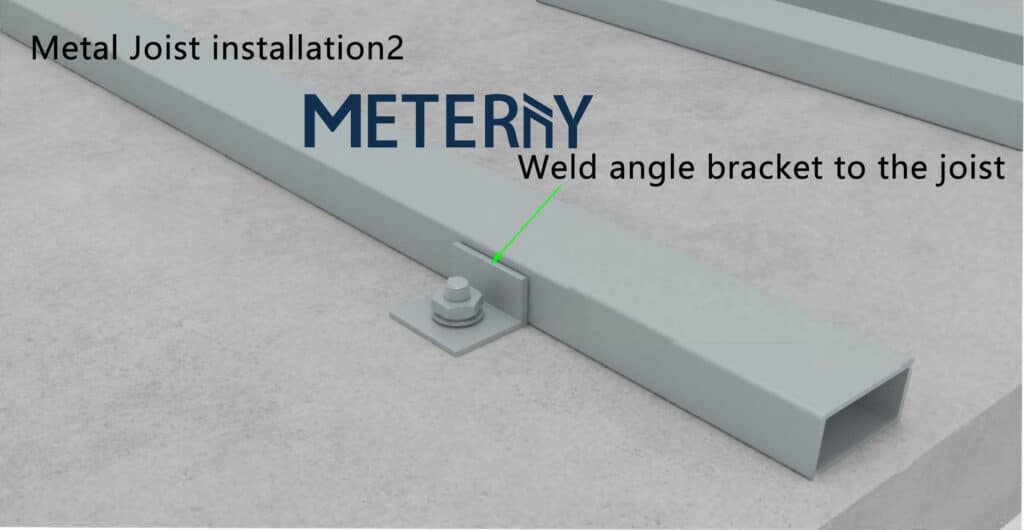
2.Alternatively, attach angle brackets to the concrete floor with expansion screws, then fix the metal joists to the brackets.
![](https://meterny.com/wp-content/uploads/2024/05/Meterny-WPC-Floor-panel-installation-guide-4-1024x530.jpg)
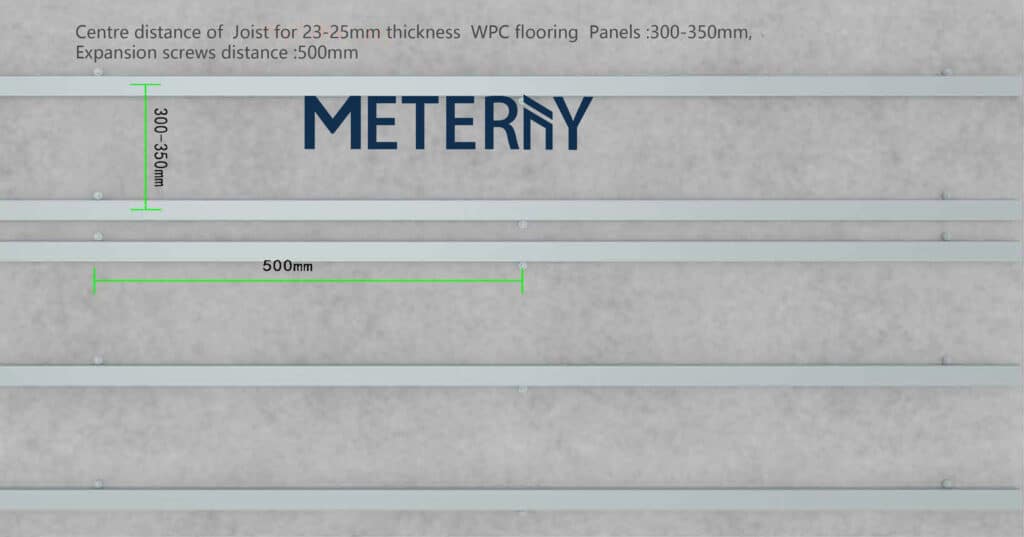
3.Maintain a center distance between joists of 300-350mm for panels with a thickness of 23-25mm, with expansion screws spaced at 500mm intervals.
![](https://meterny.com/wp-content/uploads/2024/05/Meterny-WPC-Floor-panel-installation-guide-5-1024x537.jpg)
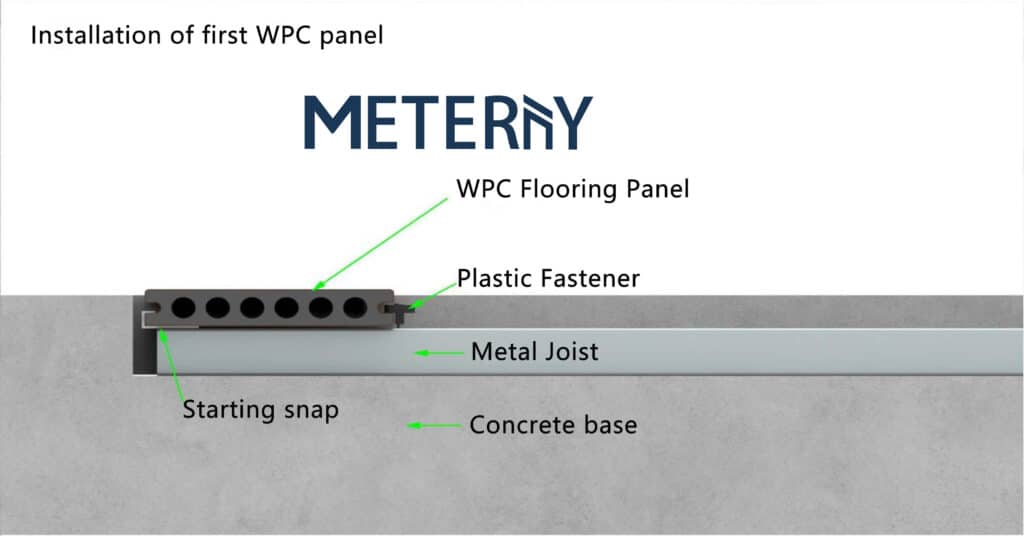
4.Begin installation by placing a starting snap at one end of the joist.
![](https://meterny.com/wp-content/uploads/2024/05/Meterny-WPC-Floor-panel-installation-guide-6-1024x533.jpg)
5.Attach the first Meterny WPC panel to the starting snap, securing one side with plastic fasteners.
![](https://meterny.com/wp-content/uploads/2024/05/Meterny-WPC-Floor-panel-installation-guide-7-1024x534.jpg)
![](https://meterny.com/wp-content/uploads/2024/05/Meterny-WPC-Floor-panel-installation-guide-8-1024x536.jpg)
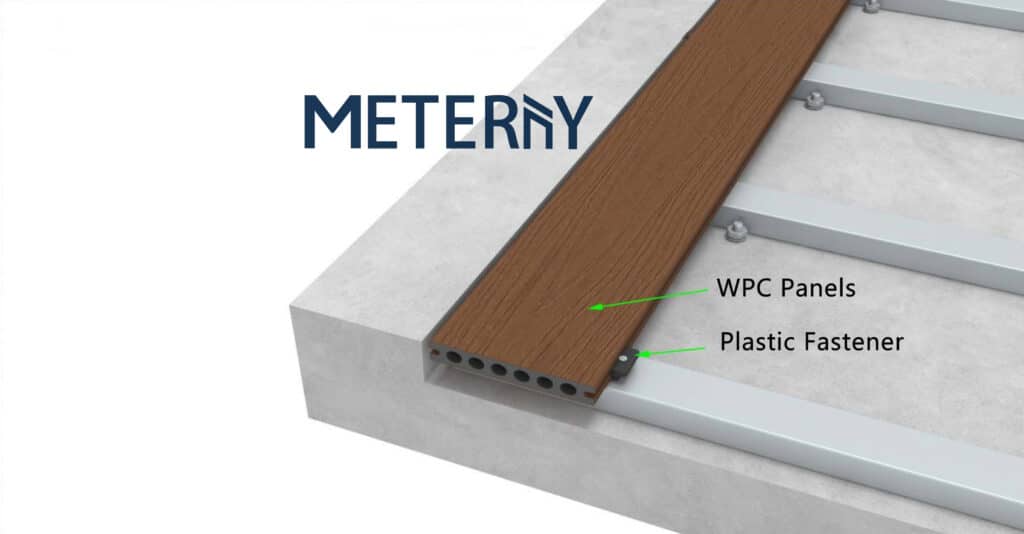
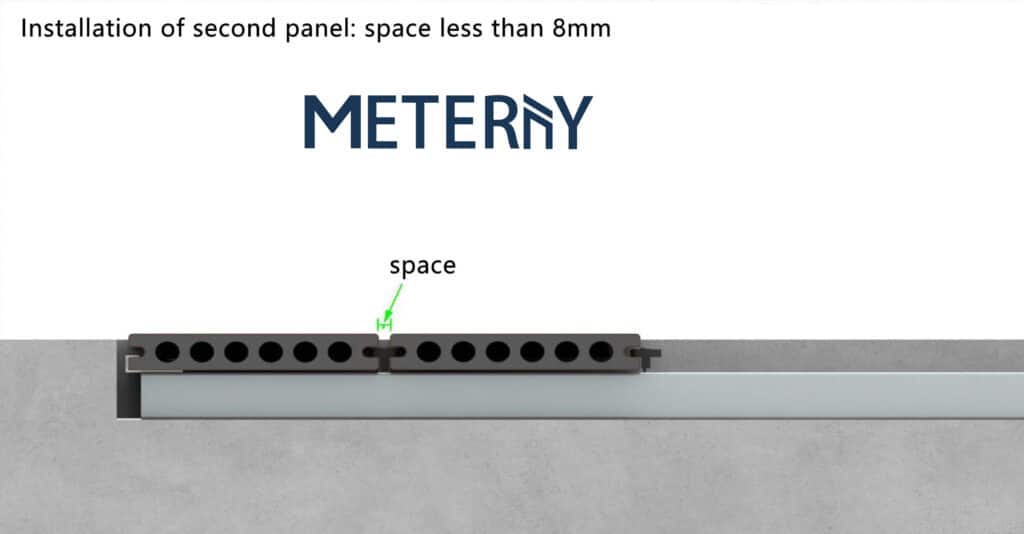
6.Install subsequent Meterny WPC panels, ensuring a gap of no more than 8mm between adjacent panels.
![](https://meterny.com/wp-content/uploads/2024/05/Meterny-WPC-Floor-panel-installation-guide-9-1024x534.jpg)
7.Enhance water drainage by incorporating gutters into the concrete floor and using double joists at the seams between WPC panels.
![Meterny WPC Floor panel installation guide-10](https://meterny.com/wp-content/uploads/2024/05/Meterny-WPC-Floor-panel-installation-guide-10-1024x519.jpg)
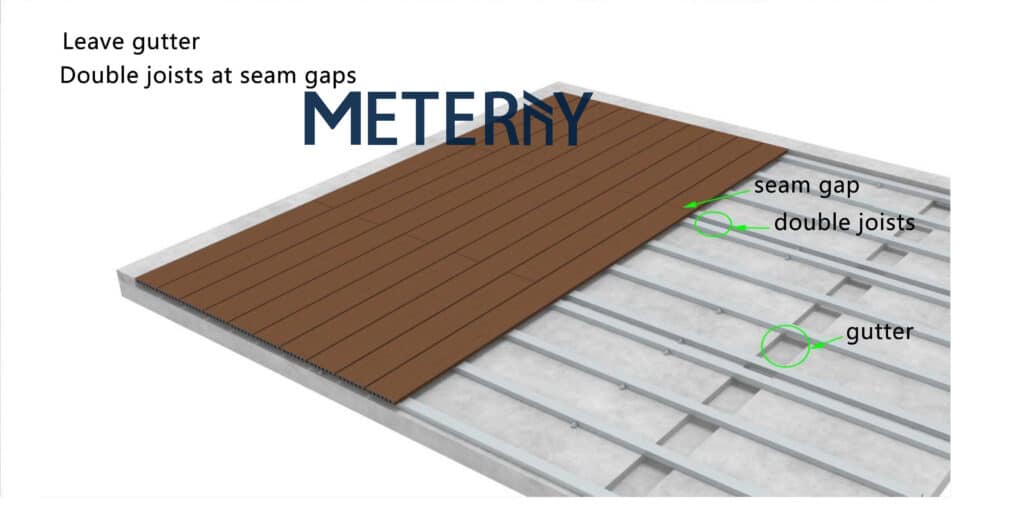
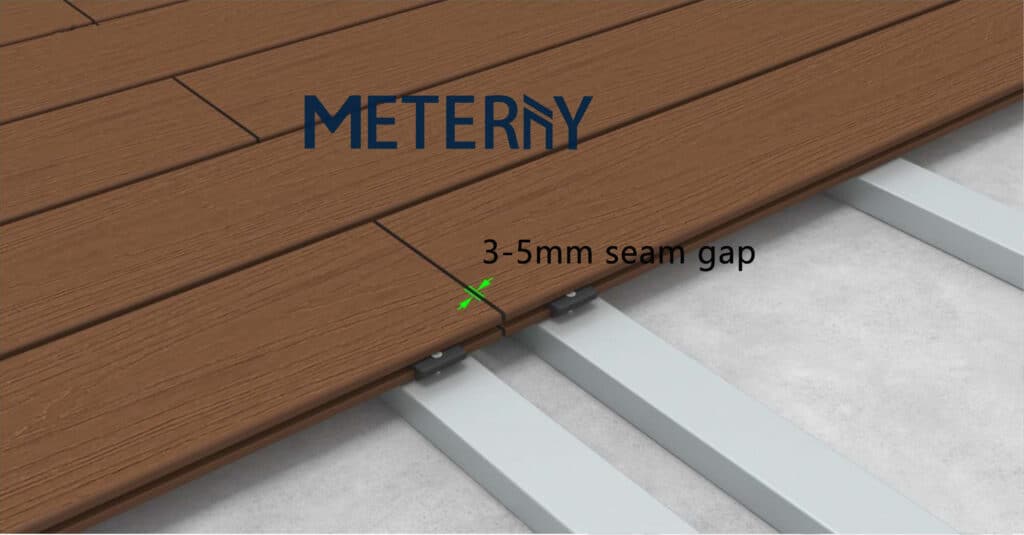
8.Maintain a seam gap width of 3-5mm between panels.
![Meterny WPC Floor panel installation guide-11](https://meterny.com/wp-content/uploads/2024/05/Meterny-WPC-Floor-panel-installation-guide-11-1024x535.jpg)
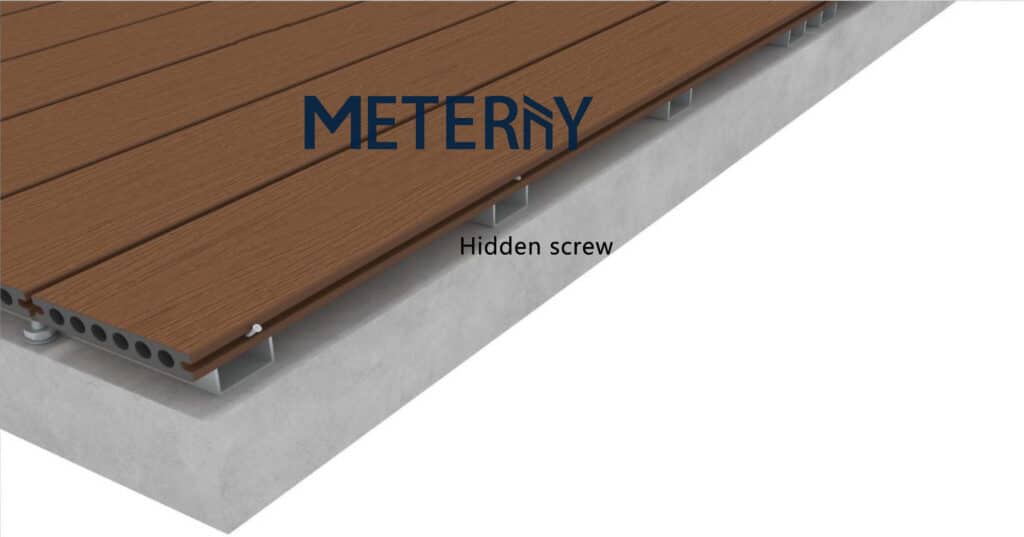
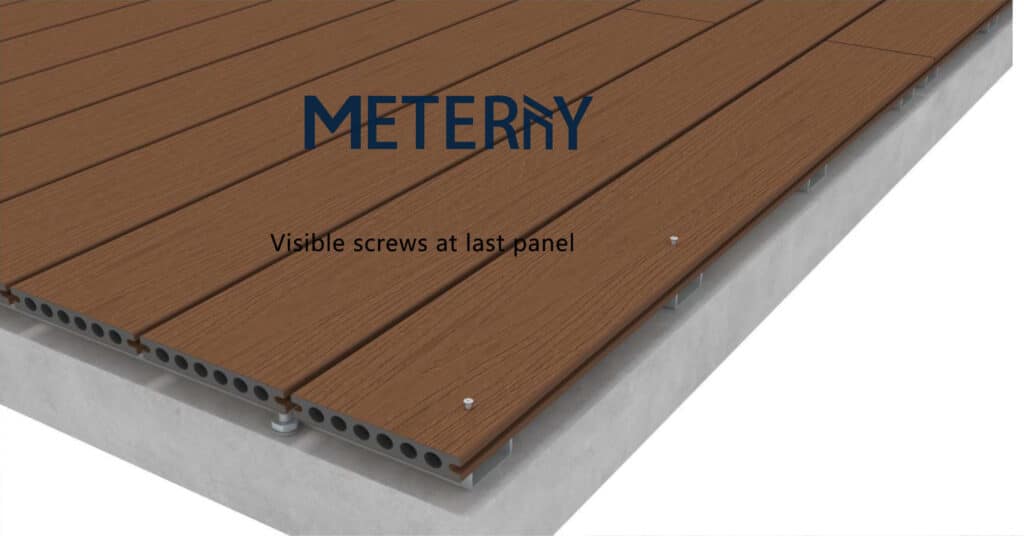
9.When installing the final panel, consider using hidden screws in the grooves on the edge of the WPC boards or visible screws on the board’s edge.
![Meterny WPC Floor panel installation guide-12](https://meterny.com/wp-content/uploads/2024/05/Meterny-WPC-Floor-panel-installation-guide-12-1024x537.jpg)
![Meterny WPC Floor panel installation guide-13](https://meterny.com/wp-content/uploads/2024/05/Meterny-WPC-Floor-panel-installation-guide-13-1024x536.jpg)
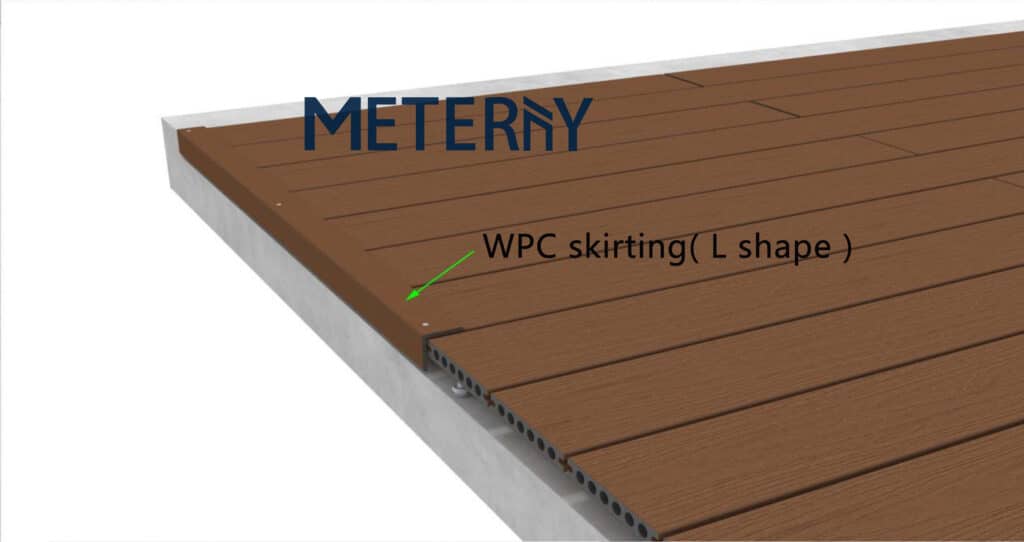
10.Complete the installation by adding WPC skirting (L-shaped side cover) to the edges of the decking for a polished appearance.
![Meterny WPC Floor panel installation guide-14](https://meterny.com/wp-content/uploads/2024/05/Meterny-WPC-Floor-panel-installation-guide-14-1024x542.jpg)